From: Robert
Sent: Sunday, February 14, 2010 4:30 PM
To: LRPLTD
Subject: RE: Wipe Dye Results
Hi George,
Here is step-by-step write up. As background, I have a 1998 BMW M3 with 90K miles. The leather interior was in reasonably good condition (no cracks or breaks in the leather itself) but, had moderate wear in spots (where the dye had been worn away) and generally looking dingy.
Because the leather was in reasonably good condition, I choose not to spray or brush the dye on. By using the wipe-dye technique I was able to control the amount of dye applied and did not have to worry about overspray. The wipe dye technique allows you to really control the application. However, I did use masking tape just as added protection where the vinyl trim meets the leather and on the BMW "M" tri-color stripe.
I had originally planned on doing this project in the summer but, could never get a window weather with low enough humidity. Then, during Christmas break this year I realized my basement remained a constant 70 degrees with 30%-40% humidity. So, after consulting my Bentley Workshop Manual, I had the entire front and rear seat assemblies removed and in by basement with in 45 minutes (far easier than I realized). I do think this was key since the basement had the right conditions and gave me great room to work. The entire project required about 10 days so I was fortunate to have a third car I could drive while the BMW was out of service. (Incidentally, I had a local upholstery shop replace the seat heating pad in the driver's seat which had previously failed - I had this done before I started the dye project).
Here are the steps I followed:
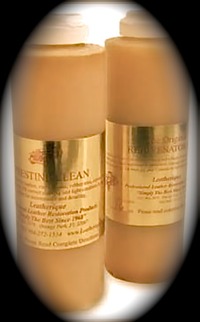
Just so you know, I had done a full treatment of Leatherique Rejuvinator and Pristine Clean about 6 months earlier.
Materials:
Leatherique Kit
Rejuvinator Oil
Pristine Clean
Prepping Agent
Leatherique Dye (ordered to match BMW "Dove Grey")
Crack Filler (optional)
Terry cloth towels
"Bounty Brand" paper towels
Masking Tape
Bottled Water (not tap)
Tupperware Bowl to hold dye (48oz to 64oz) or shallow plastic dish
Wooden paint stir sticks
Rubber or latex gloves
Funnel
I also had top quality synthetic acrylic (artificial bristle) artist’s brushes (various sizes for edges) and 600 &1000 grit sandpaper on-hand in case I needed them but, ultimately did not.
Step 1: Clean and Rejuvinate (leather and vinyl)
Apply Rejuvinator Oil liberally to leather and vinyl surfaces. I wore latex gloves and used the paper towels to work it into the leather.
Allow it to sit for 24 hours
Clean with Pristine Clean and terry cloth towels
Repeat two more times until leather is supple and strong - 24 hour wait between applications
Wait 48 hours before proceeding to next step to allow Rejuvinator to fully penetrate
Each application is relatively easy and shouldn't take more than 45 minutes at most
Step 2: Prep: Removing Surface Glaze (leather and vinyl)
Latex gloves
Pour Prepping Agent into a large bowl
Dip and wipe the leather surfaces with terry cloth towels
Rub hard. Goal is to remove gloss and bit of old dye
The rubbing takes a bit more work but, again, this should not take more than 45 minutes
Wait 24 hours dry-time before proceeding to next step
Step 3: Wipe Dye (leather and vinyl)
Temp 70 to 85 degrees, low humidity and no rain
Use masking tape to protect any vinyl trim from excess dye application.
Shake dye for 10 minutes
Immediately pour a small amount of dye into a shallow dish/ bowl so dye and pigment won’t settle out when dipping paper towel. I used a large rectangular (3"x6")Tupperware bowl and poured only enough to fill the bowl with a few millimeters of dye.
Latex gloves
Be sure surface is clean and dust free. Start in a small, inconspicuous area to get the feel.
Take a Bounty Brand paper towel and moisten it with the bottled water. Now WRING it dry
Make the Towel into a "Powder Puff" NO edges allowed.
Touch the "PUFF" into the bowel of dye (you want a little not a big BLOB).
WIPE the towel wet with dye on the surface in a circular motion using moderate pressure.
NO BACK AND FORTH PLEASE - that will cause streaking!
This is not particularly hard but, I did proceed slowly and with care.
Relax and in 20 minutes your project should be dry.
Multiple thin coats is the preferred method. The first coat may not look great. Once you have 2 or 3 coats on, then the color will look more even.
Look at the project need for dye, more than likely if you did it correct the first time, then repeat dye application as required till you are done. Several thin coats look more natural than one thick coat. If more than 2 coats necessary, allow over night to dry before any additional coats.
If you had the gloves on all you have to do is dispose of the towel and gloves, pour the dye back in the bottle, put the lid on and store in a dry location out of the sun for future touch up.
Step 4: Clean Up
Hot water and soap
Step 5: Dry Time
Allow project to remain untouched or 48 hours as dye will be fragile. After 48 hours you can reinstall your seats/ interior
Step 6: Cure Time
You can use the interior immediately after installation but, use care for 4 weeks while the dye cures
After 90 Days
You may dust leather with Pristine Clean
After 6-9 Months
You may apply Rejuvenator to protect/treat leather
I must admit, the results completely exceeded my expectations. As the before and after photos show the seats look virtually new. The color match was phenomenal as well. The actual time spent working was very little. I did a little each evening. Most of time over the ten days was the dry-time between applications.
Thanks again,
Bob

