
The answer to this FAQ is taken from an article written by Michael Charness.
In my quest to keep my car maintained properly, I've learned a lot about keeping the car looking good with various products. But I was never happy with the leather, especially on the seats. The color was worn in spots, and the leather felt stiff, more like old vinyl. Shortly after I first got the car, I did a light re-spray using Connolly Leather Dye I got from the Ferrari dealership. Carefully following the directions, it improved the appearance. Still, the seats felt like vinyl, even more so after the dye spray job.
I bought Connolly Hide Treatment (after all, shouldn’t they know best since they produced the leather used in the car?) and worked on the seats several times over several months, with no noticeable improvement. I tried Lexol, Eagle, and others, hoping to soften the leather, making it feel more like newer Ferraris. It looked great, but didn’t feel great. I couldn’t seem to make it better. Someone with similar experience told me that back in those years, Ferrari bought Connolly’s lowest grade of leather, and chalked it up to that.
Then I found out the problem wasn’t the leather. It’s that Connolly used a lacquer-based dye on the leather. They’ve stopped in recent years, but almost all but the newest Ferraris have it. And if you ever did a spray touch-up job with Connolly Leather Dye from an aerosol can, you piled on even more of it, essentially sealing the leather, making it almost impossible for leather treatments to penetrate past the surface.
OK, so now what? Have the seats recovered with new hides? Or could I restore the existing leather? This article will tell you how I was able to restore the 15-year-old seats in my 308 so that their feel and appearance rivals a new Ferrari. You’ll get enough detail so that if you decide to take on such a project, it should go quite smoothly with outstanding results; your seats can look and feel as soft as a new glove!
The project started by trying something called Leatherique Rejuvinator Oil. This product is officially recommended by Rolls Royce, is used by several automobile museums, and praised in Car Collector magazine. As I said earlier, I d tried, and kept trying, different brands of products to improve the feel of my seats. Finally this was different - this one worked as advertised, even with the lacquer-based dye on the seats before I even knew about that being a problem. I contacted the owner of Leatherique, George Pavlisko, to tell him how pleased (and astonished) I was with his product. After some discussion, he told me about the lacquer-based dye, and how that was the main reason my seats would never be as soft as new ones as long as the lacquer-based dye was there. He convinced me to strip the old dye off the seats and do a complete refinish/restoration on them. It is that experience that I am going to share with you. Since I planned ahead to document this project for one of my Concours/Detailing columns, I kept a journal of what I did and what worked best. I actually stripped and redyed the each of the two seats separately using different methods - three times. I’ve found what works best, and what not to do.
Condition the Leather First
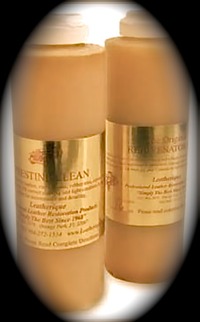
Even if you’re not going to do a re-dye job, you’re going to want to give your seats (and probably other leather) treatments of Leatherique Rejuvinator Oil. This will make an immediate and obvious difference in the softness and feel, and make it a lot less "plasticky" than the old lacquer-based dyed surface used to be. There are many ways to apply it, but I favor applying the oil by hand and hand-rubbing it into the leather and seams. I then covered it with plastic wrap to keep the oil from evaporating, and thus forcing it into the leather. Either several hours or the next day, I lifted the plastic and applied it again. After the leather has absorbed what it can, you then use Leatherique’s Prestine Clean to clean off the surface oil and any dirt and grit that the hand-application brought up. Everyone I’ve talked to who has tried it has been very pleased with the results. You’ll notice an immediate improvement, and a progressive improvement over several weeks as the oil treatment continues to be wicked into the leather fibers. The stuff is wonderful. This isn’t a commercial - this is real, personal experience.
Remove the Old Lacquer Dye Coat
If you’ve ever had your seats resprayed with Connolly Leather Dye, what I really suggest is that you get rid of the lacquer dye coat entirely, and the respray build-up, so it can feel like the newer Ferraris and leather in other newer luxury cars. I ordered the Leatherique water-based dye to match my Ferrari Tan (Connolly Saddle #3218), though the Leatherique folks will create custom batches optically matched to your leather if you send them a cutting (which you can get from under a seat) for no extra charge.
My first step (even before taking the seats out of the car) was that I tested the dye with a q-tip, wiping it on top of some of the leather that was refinished with Connolly dye (spray can) last year to see if it was a proper color match. It was exact to my eye. So, that told me that I could probably refinish the seats without them appearing mismatched to the center console and door panels. Good.
Next, using a brand new can of lacquer thinner for the project, I did some wiping on the back of the passenger seat to see what it would do. I hadn’t used Leatherique Rejuv Oil on the back of the seat before, only on the visible surfaces, primarily the seating surfaces. With the lacquer thinner, I first did a spot about 3 inches square, using a brisk rubbing with a new white terrycloth dampened in the thinner. After rubbing, I examined the leather, and compared to the surrounding (untouched) area, it was a lot smoother to the touch, and a lot softer, merely by removing the surface layer of lacquer dye. I did a second application of thinner on the same area, but it didn't make a noticeable difference, so one good application seems to be sufficient, though there was just a little more dye on the cloth afterwards. What I was surprised to find was that the color of the leather didn't change! It was no longer shiny (it becomes a flat finish), and much smoother to the touch, and didn’t crinkle when pinching it, but it was still saddle colored. What this tells me is that even with the lacquer dye, the leather surface did absorb the color to a major degree 15 years ago. That’s good.
Then I did a section on the outside bolster of the passenger seat, which was an area well-treated with the Leatherque Rejuv Oil. Same results in smoothness and color as the back of the seats, though of course the leather itself was softer due to the earlier oil treatments. I was ready to go for it!
Beginning the Re-Dye
If you’re going to do a re-dye job, you’re better off planning to do it over a couple of weekends. One for prep, and one for dye, and it’s no problem to leave one or more weekends in between. Basically, the first weekend you need to take the seats out of the car, do a complete rubdown with clean lacquer thinner to take off the old dye layer(s), let it dry, do your Rejuvinator Oil treatments, then go over the seats with Prestine Clean. The next weekend, you’ll use Leatherique‘s Surface Prep and then do the dye job.
Remove the Seats
First, getting the seat out: a 6mm allen wrench takes out the four bolts that hold the seat track to the pan. Do the front bolts first, then move the seat to the front-most position on the track to reveal access to the rear bolts. Once they're out, lift the seat straight up and out the door (if you’ve got a GTS, take the roof off first).
Prep the Leather Surface
Second, the prep work: Use a new, clean, white terrycloth shop towel, and pour the fresh lacquer thinner on the towel (not the seat!), and start rubbing. The old lacquer dye will start coming off quickly, and on mine it came off thick enough to cake on the towel. Do one seat area at a time. Keep changing to a clean area of the towel, and fresh thinner, until it doesn’t cake, though you'll always be able to get more dye off. What you want to do is be consistent in how far you take the old lacquer finish off. The color will remain in the surface of the leather (it did absorb the old dye) -- you just want to take off the dye layer that is sitting on top of the leather. Don t rub so hard that you go through the upper surface and end up with suede.
After the lacquer-thinner work, let your seat dry for a few hours, then do the Rejuvinator Oil and Prestine Clean treatments mentioned earlier. Give your seats a week to more fully absorb the treatments. If you don’t, you may end up with an impermanent dye that will come off if moisture gets to it! I found out the hard way.
After at least a week or more following your Rejuvinator Oil treatments, wipe down the seat with Leatherique s Surface Prep solution. This takes off a little soluble dye-colored film left by the lacquer thinner. The instructions say to let dry for at least 6 hours before applying the dye, and overnight is even better. I found out that this is important: just before dyeing, I touched up a small area I didn’t think I had done a good enough job with the lacquer thinner and Surface Prep, and when the dye went on 20 minutes later, that area didn’t absorb the new dye as smoothly as the other areas.
I'm not quite sure how all the parts of a seat come apart - if I needed to do that, I’d probably have taken the seat down to an upholstery shop to get some help with disassembly. But if you aren’t dyeing the seats a new color, but merely restoring them after removing the lacquer layer, there is no need to fully disassemble the seat; merely mask off the hardware (headrest fittings, release hardware, and track rails) with masking tape.
Total time for removal and prep of the passenger seat: 1 hour of actual work per seat. The rest is time to let it dry/set between steps.
Apply the Dye
Third Step, the dye job. Find yourself a place with good lighting and low dust, on a day with comfortable temperature and low humidity. I started doing the project in my garage, but even with all the overhead lighting, I ended up moving the seats outside where I could see what I was doing much better. It was a nice day, mid-70 s, no wind, low humidity, bright but with clouds, which made for great diffused lighting.
Since most people have never used an airbrush, and I was doing this project in part for this article, I decided to try other methods of application that would be easier for most people. The instructions with Leatherique’s dye is to brush it on if you’re not spraying it. This is not a good idea for Ferrari leather, as their dye is designed to be able to flow into and fill grain to produce a very smooth leather finish if you wish. While that is pretty, it isn’t original; Ferrari’s Connolly leather's grain is an important part of its uniqueness. What I found works best was to use another clean white terry cloth shop towel, and save the brushing for small and difficult to reach areas. Put the seat up on a heavy cardboard box to get it off of the ground - that makes it a lot easier to see what you’re doing and especially when working around the lower portions. Put on vinyl gloves, or your own hide will end up being dyed too. Put a very small squirt (probably the equivalent of about 10 drops) of dye on the cloth, and then blot it around the cloth so it’s not obviously wet looking. Then, doing a section of the seat at a time, color the leather with a swirl motion to work the dye into the leather, including all the seams and piping. Being a detailer, I’m used to waxing and polishing lightly in back-and-forth motions - DON'T DO THAT with the leather. I started that way and ended up with streaks in those sections and it took extra work to smooth out the appearance. If you’re not doing a color change, all you want to do is be putting down a very light coating of dye - not very thick - to refresh and smooth out the color that's already there. Work it into the leather like you were applying a wood stain - it’s what is sometimes called a color wash. You use the cloth to spread the dye around and actually work it into the leather without leaving a thick coating, since you’re rubbing it in but not leaving much on the surface. You don't want to remove all the dye, but you also don t want to leave so much liquid dye down that it puddles in any way. It should appear almost dry when you’re done rubbing. You just want to enrich and smooth the existing color, while leaving more pigment in the few places that need additional coverage. Rather than one heavy coat, doing two light coats will give you a more natural, translucent finish. It’s ok, and in fact preferable, to be able to see natural variations in the leather grain and color. Remember, you’re trying to get away from that painted look that we started with! If you apply a lot of dye, and/or rub it too hard into the leather, the surface will look too perfect, too consistent, more like a new Mercedes or BMW instead of like a well-cared for older Ferrari. Where you have deep furrows of wear, you will find that if you work the dye into them, they become almost invisible, even though you’re not filling them up in any way, just by getting color down into the crevices.
On 308s, at least, the leather is very grainy. In the instructions that came with the old Connolly spray cans, they tell you not to spray very heavily or you will fill-in the grain. Well, you can't really do that with the water-based dye unless you put on a pretty thick layer and force it into the grain, which is another reason the cloth technique does well if you don't know how to airbrush. The grain will always be there, but how you apply the dye does affect how much the grain shows, and whether the inside of the grain is visibly darker than the upper surface. If you have the grain showing too much in an area, just put the dye on a little more heavily (wet) and leave it sit for about 10-15 seconds before you start wiping it around and off with the cloth, and/or wipe it harder into the leather. This also works if you have deep darker furrows in the wear areas of your leather - you can use a small paintbrush to just put dye into those furrows, wait 10 to 30 seconds, then use the cloth to gently blend them in. On the passenger seat, after stripping off the old lacquer dye layer, I noticed some light spots on the seat especially on the front and one side, almost like they were bleach spots. I suspect that they are the result of some spillage of coke or some other drink/fluid that happened before I bought the car. The paintbrush, wait, blend technique worked pretty well on those too.
Keep in mind that if you don t like the way it comes out, don't worry. You can add another coat of more dye if you’re too light, or you can use the Surface Prep liquid to remove any dye on the surface if you've put on too much. In fact, the tendency will probably be to use too much. The Leatherique Dye is a penetrating dye, which means that it gets down into the leather. If you like a lot of grain and your leather is in good condition (no suede areas), work the dye into the leather very well and let it dry for a couple of hours, then go over it lightly with Surface Prep liquid. You’ll find that you’ll be able to see the grain extremely well, yet have a nice consistent color overall afterwards. It will have no gloss and look rather flat, but you can buff it up by hand with a cheesecloth after 48 hours. If you don t like that look, then just put on another light coat of dye to lessen the grain. Leatherique also has their dye base available with no pigment added so that it dries clear as an extra protectant, such as for high wear areas. I chose not to use it.
Time to apply 1st normal coat of dye: 45 minutes per seat
If the Leather Surface is Blemished
If your underlying leather s surface is not in good condition, you may not be able to just restore the original color with the wash technique, because it won t put enough dye down. You may need to repair areas of the leather surface, and you’ll need to brush or spray the dye (preferably spray) to put more pigment down and get heavier coverage, though this will fill in (smooth out) the grain somewhat compared to its factory original state. If you have cracks, tears or cuts in the leather (I had a small surface cut in one bolster), Leatherique has a Crack Filler product which stays flexible and works wonderfully; just follow the directions. If your leather is scuffed/worn badly in just a few small areas (like mine was just on the outer driver s seat bolster), you can stipple that area with dye and build it up there in such a way as to give an appearance of grain where there used to be a suede-like surface. This is sort of like using a sponging technique when painting a wall. First use a small paintbrush and cover the abraded surface area (only) with a good coat of dye. When it has dried for a couple of hours (you can speed it up with a hair dryer on low), use a small portion of the terrycloth towel, add dye, and pat the dye onto the area to add texture. Wait a couple more hours until it dries, then go back and blend this area into the surrounding area with new dye. Don’t rub hard, or you will remove the stipple work you did as the new dye will still be fragile and easily dissolve back into solution.
Apply a Second Coat
After a couple of hours, you can go back and do a second coat, if necessary. I was very pleased with the way the seat looked after the first coat was dry. The wet color was rather orange, but the dry color was perfect. The second coat made the appearance even better, and helped smooth out any streaks, and to more consistently cover the areas that showed darker grain or had deep furrows.
Total time for second coat: 20 minutes per seat.
The next day, a little touch up here and there took another 15 minutes total for both seats.
Allow the Dye to Set
Now the seats are to be left untouched for 48 hours for complete drying/setting. Initially, the surface will look flat with no gloss. Get a cheesecloth polishing cloth from your autoparts store and hand buff the leather surface to get the amount of gloss (I like a matte/semi-gloss look) that suits you. The instructions that came with my Leatherique products said to follow the dye job with a Prestine Clean treatment to set the color. Do not do that! The newer formulations of the dye will apparently be chemically altered and ruined by treating with the cleaner or oil, and your dye will be no longer water-insoluble (as I found out the hard way). Do not clean the leather surface with anything other than a water-dampened cloth for several months. You really won’t need to, anyway.
I'm repeating myself here, but it’s important: Remember that with a water-based dye, in contrast to the old lacquer-based dye/paint, it is translucent unless you do heavy and/or multiple coats. That translucency, with the grainy leather, helps retain the original/stock look, rather than the perfect smooth finish of leather on newer luxury cars. Keep this in mind if looking original is important to you for your own tastes or for Concours (it is for me). But with the Leatherique water-based dye, at least, you have very good control over the amount of pigment that ends up on/in the leather. Another nice feature is that you can touch up areas in the seating/wear surfaces in the future without having to remove the seats from the car next time.
As I’ve said earlier, I m very pleased with the results... the seats look and feel GREAT. Of course, my seats were in good condition before we started, but I was concerned that taking off the lacquer dye/paint layer, and doing the re-dye job myself might leave it looking amateurish. It doesn’t. I have glove-soft leather seats that feel and look fantastic (and even smell like new leather), and the leather will last longer since it can breathe without that lacquer layer.
Except for the new soft feel of the surface, the color matches my door panels and center console, so there s no rush to do it all at one time. However, this was such a rewarding experience with such great results, I m going to do the rest of the leather in the near future.
Leatherique may not be the only good products of this type out there, but they are the first and only ones I’ve found of this quality, and the ones I used in my restoration job. If you would like to contact them, you can find them at www.Leatherique.com or call George Pavlisko himself at 803-649-3803.(Phone number updated by G.C.P.)
Contributions to this FAQ by: Mike Charness