ORDER A STEERING WHEEL KIT $25.00+ S&H
(THANK YOU JASON ABSHIRE FOR THIS ARTICLE)
My
steering wheel was in pretty bad shape and desperately needed to be restored
and refinished to its original factory feel and look. Replacement or having
someone do a rewrap at an upholstery shop would be an expensive option that
would literally break the bank. However with a little work I refinished
with excellent results!
Before:

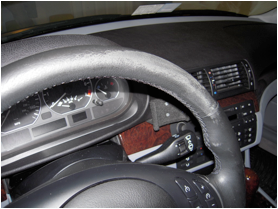
After:


I
purchased the Leatherique steering wheel kit for $27 (http://www.leatherique.com/)
and had absolutely phenomenal results. I was very impressed the products
themselves and with the little amount of effort it took to make the wheel look
and feel new again (estimate about 6 hours over 5 or so days). Of
course I spent the majority of the time prepping the wheel, and I have a lot of
experience shooting paints/stains, your skill level will determine the end
result. That’s just my disclaimer, don’t let that discourage you, this is truly
an easy DIY.
What you’ll need:
Leatherique Steering Wheel Kit (includes 4oz of each of the following: Prepping
agent, Black Dye, and Klear Kote)
Leatherique Rejuvenator oil (If you have leather you should have this stuff on
hand at all times, the most amazing cleaner available in my opinion)
Leatherique Pristine clean (Same as above)
A few sheets of 600, 1000, 1500 grit sandpapers
Crack Filler (Used if you have any problem areas that don’t come smooth after
you hit it with your 1500 grit)
1. A few days before I started the actual
refinishing of the wheel, I did a rejuvenator oil and pristine clean treatment
to hydrate and clean the leather. Once I pristine cleaned the wheel, I
let it dry for a few days.
2. Disconnect the negative battery terminal, and
removed the steering wheel.
3. Once the wheel is off I removed all of the
electronics and trim plates.
4. I sanded the wheel with some 600 grit wet/dry
sandpaper with the prepping agent to remove all of the original glaze, oils,
and die. The prepping agent did an excellent job removing the old dye; make
sure you wear gloves!
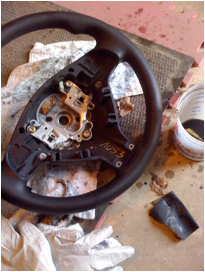
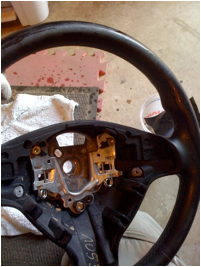
5.
Once I did a round of 600 grit, I moved to 1000
grit, then to 1500 grit. The wheel was now silky smooth with the
exception of 1 o’clock. From the pictures one will note some pretty nasty
damage at this and the 8 o’clock positions. The 8 o’clock position was
easily sanded and blended perfectly, not so with the 1 o’clock position.
Not to worry… I have some crack filler on hand from a previous repair for
a screw driver in the back pocket incident that I don’t want to talk about. I
applied it onto the damaged area and press it into the area with a plastic
applicator. I let that cure for about 3 hours and went back at it with my
sanding regime 600, 1000, 1500. Problem solved, worked perfectly! I let the
filler and dye cure for 24 hours.
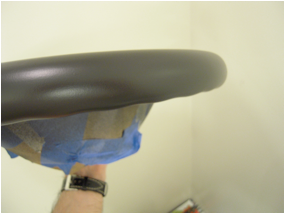
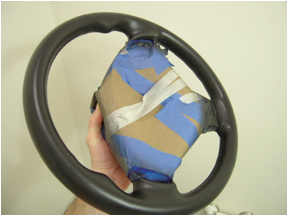
6. Next, mask off with paper/tape around anything
you don’t want to get dye on, for me that was the interior of the wheel and the
rear vinyl etc…
7. From the directions you can wipe the dye on,
but for a more factory finish I decided to spray (I have a decent HVLP setup).
I realize most DIY’ers won’t probably have this, but It’ll definitely
take your results to the next level, gave me a very smooth and consistent
professional finish, plus its very fast and uses significantly less product.
The wiping/blotting technique on the leatherique site has been used with
great success as an alternative to spraying.
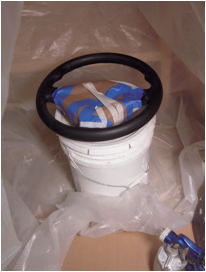
8. Shot 3 coats, fine mist each time. I
thinned 4:1 with distilled water for those who will spray. After this my
fix to the 8 o’clock position was completely undistinguishable like it was
never there!
9. I Let the dye sit for another 24 hours, and
then applied a coat of Klear Kote. I applied the Klear with piece of
(clean/lint free) T shirt and wiped it on, being careful to do in a uniform way
to reduce buildup and streaks.
10. Let that sit for another 24 hours and reinstall the wheel.
That’s it..
The biggest issue anyone might face is, unless you have an old wheel, you’ll be
out of a steering wheel for at least 3 days while your dyeing and refinishing
the wheel, plan accordingly. From a product standpoint I used 1.5oz of
dye, .5 oz of Klear Kote, and about 3oz of the prepping agent. So with the
exception of the prepping agent I could do another couple wheels with the
amount of product I have left.

